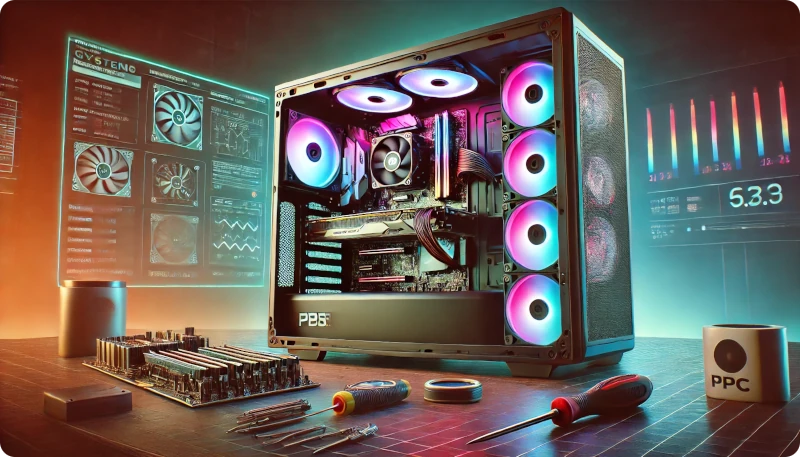
There are Gamers who enjoy playing games on gaming consoles like the PlayStation and Xbox. Then there are many who like the exciting experience of building their custom gaming rigs from the ground up. Building your own gaming PC gives you the freedom to customize it the way you want. Consequently, You can customize it according to the specifications of the games that you intend to be playing on it. Building a gaming PC can be a rewarding experience. In this guide, we will walk you through the steps you should take to build a powerful and high-performance gaming PC.
Step 1: Planning Your Build
Everything starts with planning. Before you start buying all the components that you need, you need to plan your build. Therefore, here are some considerations to take when building a gaming PC:
- Budget: Decide on how much you are willing to spend, the budget will determine the overall PC quality and performance. Of course, the more money available the better components you will get. But we will show you some of the components that are available at a fair price.
- Purpose: What games are you going to be playing on the computer? This will help to determine the amount and type of computing resources that you need. Some games are heavy on resources, especially the CPU and GPU while other games are not resource hungry as others.
- Compatibility: Make sure that all the components that you choose are compatible with each other. It is a frustrating thing to get components and then find out later that they cannot operate together.
Step 2: Choosing The Components Of a Gaming PC
Here are the main components that will make up your gaming system:
1. CPU (Central Processing Unit)
This is the brain of the computer. For gaming, a mid to high-end CPU from Intel or AMD is recommended
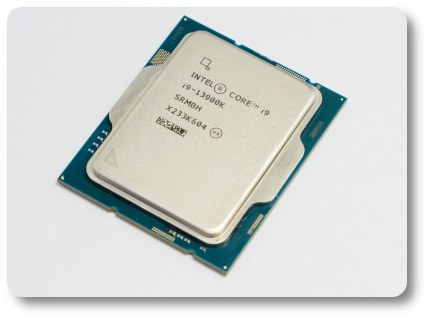
Intel Core i9-13900K: This is a top-tier CPU with excellent gaming performance and multitasking capabilities. It has a total of 24 cores with up to 5.80GHz turbo frequency, and it has 32MB of cache memory.
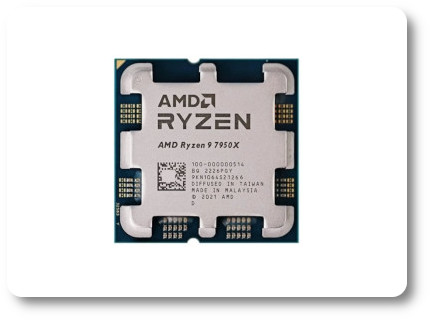
AMD Ryzen 9 7950X: Known for its high core count and great performance in both gaming and productivity tasks. Additionally, it is clocked at 4.5GHz with 16 MB L2 plus 64 MB L3 cache memory. Furthermore, it is a hexadeca-core (16 core) processor that consumes less power to offer maximum productivity.
2. GPU (Graphics Processing Unit):
Probably the most important component when it comes to gaming. The GPU processes the pictures displayed on the monitor. Every gamer knows that a good game is the one with stunning graphics and vivid colors. Indeed, NVIDIA and AMD offer powerful options when it comes to GPUs. Here are two options to consider when building a gaming PC:
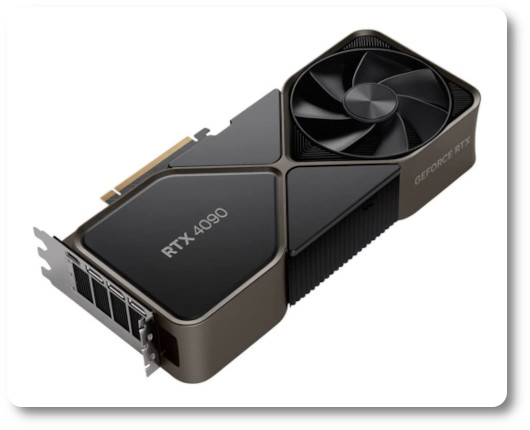
NVIDIA GeForce RTX 4090: The latest flagship GPU from NVIDIA designed for gaming. The RTX 4090 delivers exceptional performance in 4K gaming and ray tracing. NVIDIA launched it on September 20th, 2022. All in all, the feature rich and performance level of the RTX 4090 ensures that all modern games run at their full potential.
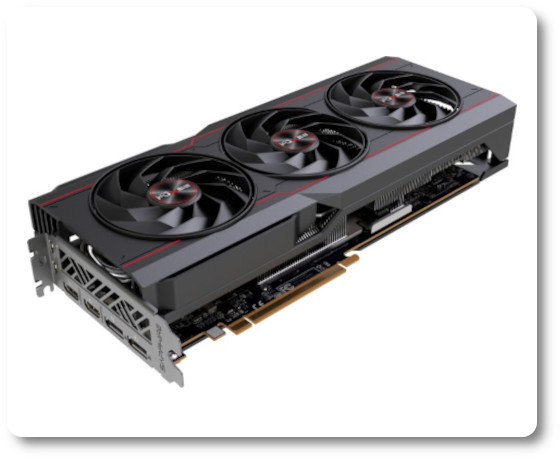
AMD Radeon RX 7900 XTX: With 24GB of GDDR6 memory, AMD’s RX 7900 offers great performance and value. They launched the RX 7900 on November 3, 2022, designing it specifically for high-resolution gaming. This GPU is probably one of the best choices to include in your gaming rig. The DirectX 12 Ultimate capability of this GPU guarantees support for hardware-raytracing and variable-rate shading, features in many new games.
3. The Motherboard
The motherboard is the backbone of your entire system, basically, it is the intersection where all your components go through. Ensure the motherboard you choose for your computer is compatible with the CPU you will use. Important features necessary are the amount of RAM slots available. Therefore, you need enough slots to be able to upgrade your memory in future. The amount of PCIe slots available should be enough to allow you to add extra components when necessary. Connectivity is also an important feature, a built-in Gigabit Ethernet port is desirable. Also, consider getting a wireless card for added connectivity options. Here are two of the motherboards to consider when building a gaming PC:
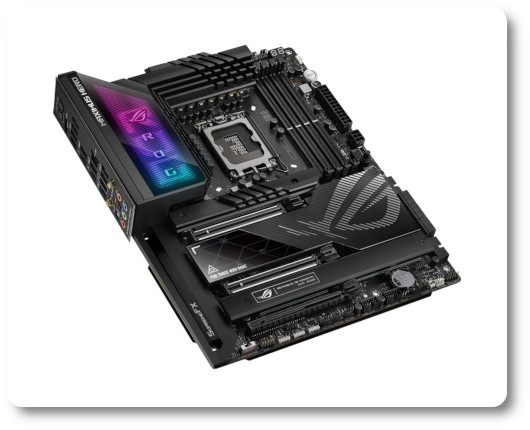
ASUS ROG Maximus Z790 Hero: This is a premium motherboard for Intel CPUs with robust power delivery and plenty of features. If you choose the Intel Core i9-13900K as your processor, then this motherboard is the best fit. Specifically, it is based on the Intel Z790 chipset. Some features of the board include 2 PCIe 5.0 x16 Safeslots, 1 PCIe 4.0 x16 slot, 4 DDR5 DIMM Dual Channel Memory Architecture slots, Dual ProCool Power Connectors, and ROG water cooling. In addition, the board comes with 1 built-in HDMI port. Furthermore, it features AI Overclocking and AI Cooling, and it has an Intel 2.5Gb Ethernet port and support for Wi-Fi 6E.
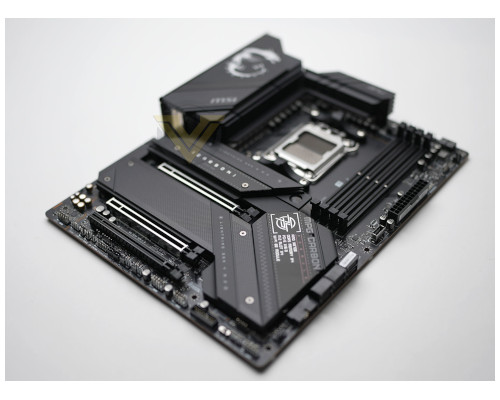
MSI MPG X670E Carbon WiFi: A high-end motherboard for AMD Ryzen 7000 series with excellent build quality and connectivity. If your processor was the AMD Ryzen 9 7950X, then, this Motherboard is your best choice. It is based on the AMD X670 chipset, it supports AMD Ryzen 8000/ 7000 Series Desktop Processors. Additionally, it has 4x DDR5 DIMM slots with Maximum Memory Capacity of 256GB. The Board has a Realtek RTL8125BG 2.5Gbps LAN port, 1 built in HDMI port, 3 PCIe x 16 slots, and support for Wi-Fi 6E.
4. RAM (Random Access Memory)
16GB of RAM is enough for most games; but going over this might prepare you for the future upgrades. Therefore, depending on budget availability, 32GB will be ideal for your build. Additionally, ensure the RAM that you are getting is compatible with your motherboard. Below is one great choice for your gaming rig:
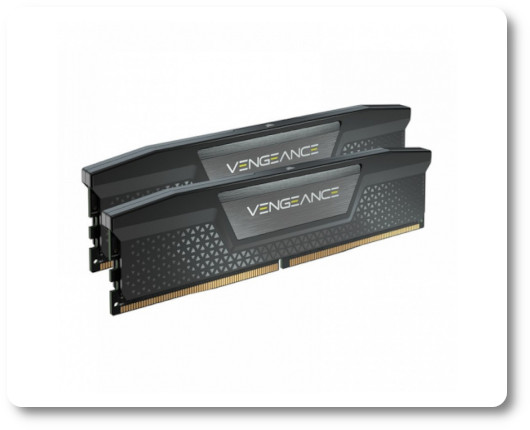
Corsair Vengeance LPX 32GB (2 x 16GB) DDR5-5200: This is a high-speed RAM that offers great performance for gaming and multitasking. It comes in 16GB size sticks. Therefore, you can start with one chip for 16GB. But like i said before, 2 chips might be ideal to future proof you with a total of 32GB. Undeniably, they designed the VENGEANCE LPX memory for high-performance overclocking. It is a DDR4 RAM with a speed of 3600MHz. It has a low profile that makes it ideal for cases with limited space. Additionally, the chip has a low power consumption, and its aluminium cooling system dispenses heat efficiently.
5. Storage
SSDs (Solid State Drives) are much faster than traditional HDDs (Hard Disk Drives). Hence, a combination of both might be ideal to cut on the cost. Specifically, use an SSD for your operating system and games, and an additional HDD for secondary storage. Here are two of the suggested drives for your storage when building a gaming PC.
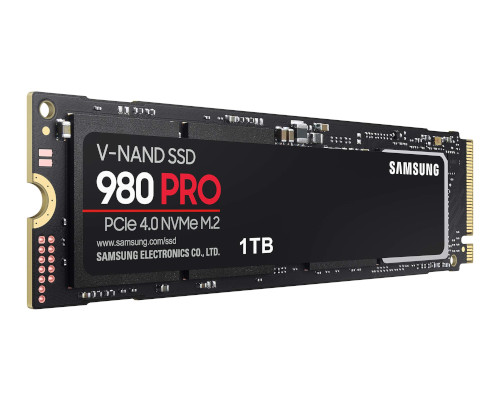
Samsung 980 Pro 1TB NVMe SSD: A fast and reliable NVMe SSD for your OS and games. This SSD has a maximum capacity of 2 terabytes. Certainly ideal for heavy computing, high resolution graphics and PC gaming, . You can also get it in smaller capacities like 1T, 500GB, or 250GB. The 980 PRO delivers 2x the data transfer rate of PCIe 3.0, while maintaining compatibility with PCIe 3.0. Also, It uses nickel coating to help manage the controller’s heat level. To summarize, this SSD will be ideal to host the Operating system and the games.
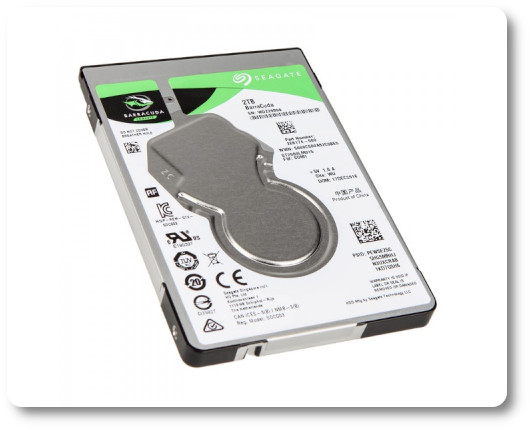
Seagate Barracuda 2TB HDD: While the 980 Pro is good for the OS, this is a good option for additional storage. The Barracuda is a 2.5-inch SATA drive. It features specialized caching technology for optimized data flow and faster loading. With a capacity of 2T, it is more than enough to act as a secondary storage for your gaming rig.
6. Power Supply Unit (PSU)
Equally important is a reliable Power supply Unit (PSU) which is essential for your gaming computer. Because of that, choose a PSU with enough wattage to power all your components and a bit more for future upgrades. Aim for at least an 80 Plus Bronze certification for efficiency. Below is our recommendation for a reliable PSU when building a gaming PC.
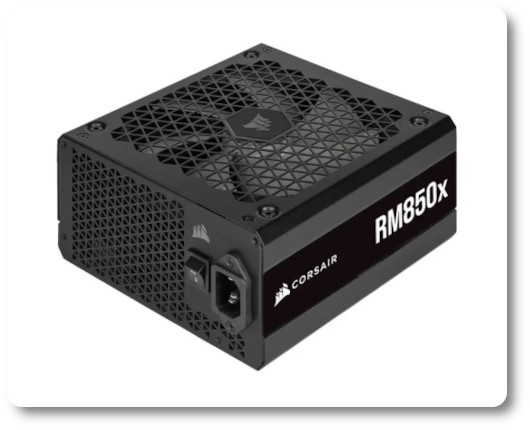
Corsair RM850x (2021) 850W 80 Plus Gold: A highly reliable PSU with modular cables and excellent efficiency. It has a 135mm Magnetic Levitation Fan, utilizing a magnetic levitation bearing and custom engineered rotors for high performance, low noise, and superior reliability. Furthermore, the modular nature of the PSU makes it easy for a clean build as you only need to connect cables that your system needs. Coupled with a EPS12V Connector, the RM850x has a wide compatibility with modern graphics cards and motherboards. Additionally, its Premium internal components ensure unmatched power delivery and long-term reliability. And finally, it has an ATX form factor with a wattage of 850 watts.
7. Case
The case is the housing that accommodates your entire system. Therefore it should fit all your components and have good airflow to keep everything cool. Consider a case with ample space for future upgrades. A stylish case adds class to your gaming rig, but it is not all about class when it comes to the case. The case must allow for proper cooling, easy upgrades, durability, and compatibility with other components. Below are two of our recommended cases when building a gaming PC:
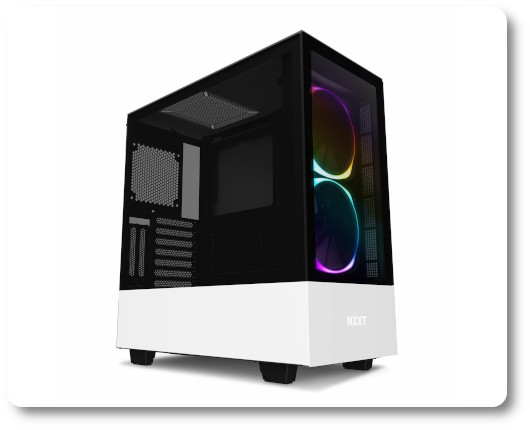
NZXT H510 Elite: The H510 Elite is a premium compact mid-tower stylish case with good airflow and tempered glass panels. Moreover, two tinted tempered glass panels, which are ideal for showcasing stunning RGB builds, make up most parts of the chassis. Additionally, it features an iconic cable management bar for a neat build. Furthermore, it has 3 internal 3.5-inch drive bays and 3 internal 2.5″ drive bays. Finally, the front has one USB 3.1 Gen 1 Type-A and one USB 3.1 Gen 2 Type-C port.
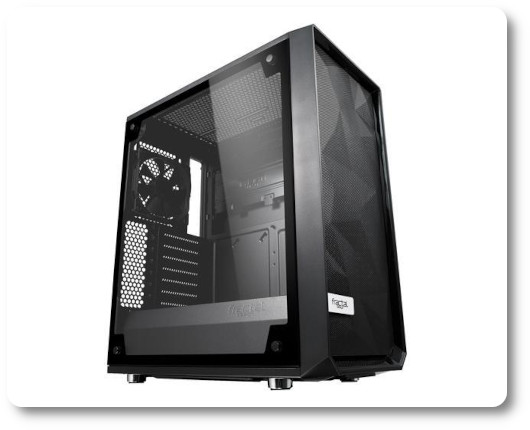
Fractal Design Meshify C: Fractal Design made the Meshify C, an ATX mid-tower case. Gamers know it for its excellent airflow and build quality. Additionally, the Meshify C features tinted tempered glass side panels, which are good for RGB showcasing. Moreover, it has two internal 3.5-inch and three internal 2.5-inch drive bays, as well as seven expansion slots, which are enough for most cases. Furthermore, it is compatible with ATX, micro-ATX, and mini-ITX motherboard form factors. Lastly, the airflow on this case is very good, making it ideal for regions that have high temperatures.
8. Cooling
Good cooling is vital for performance of the gaming computer.Modern games require high computing resources, which produce a huge amount of heat. Stock coolers can be sufficient in some cases, but aftermarket air or liquid coolers can offer an even better performance. To improve the performance and durability of your gaming PC, install a liquid or air cooler. A good cooling system offers good cooling with little noise. Listed below are our recommended air and liquid coolers when building a gaming PC:
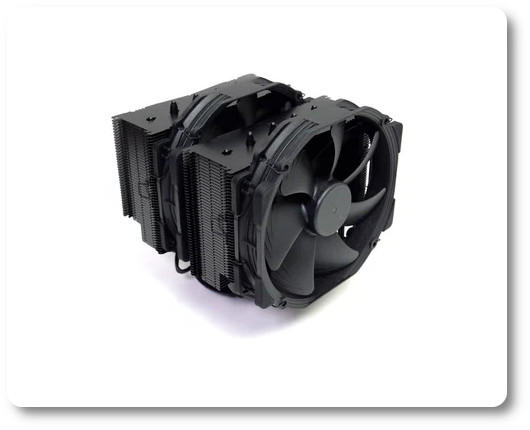
Noctua NH-D15: Noctua’s flagship model, the NH-D15, is an elite-class dual tower air cooler designed for the highest demands of gaming. First and foremost, this top-tier cooler is known for its excellent cooling performance and quiet operation. Moreover, it has two premium-grade NF-A15 140mm fans with PWM support for automatic speed control, allowing for improved efficiency.
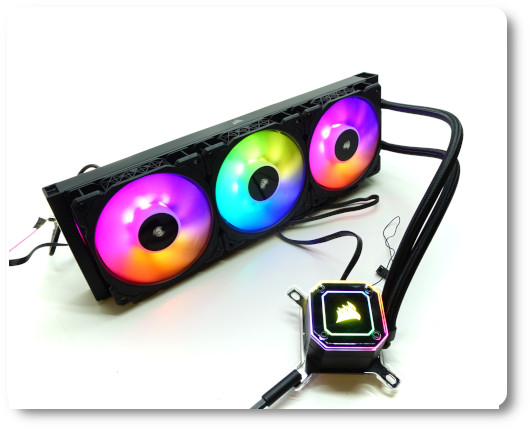
Corsair iCUE H150i Elite Capellix: This high-performance liquid cooler comes with customizable RGB lighting. Firstly, it delivers powerful low noise cooling for your CPU. Additionally, the three 120mm Corsair ML RGB Magnetic Levitation PWM fans deliver powerful airflow for extreme CPU cooling performance. Moreover, the H150i has eight RGB LEDs per fan. This liquid cooler supports AMD AM4, Threadripper TR4 (gen 1 and 2), as well as the new Threadripper sTRX4 socket. For Intel, the H150i Elite is compatible with Intel 1200, 115x, 2066, and 2011x. Furthermore, the H150i features a Commander CORE control module, which provides the ability to extend control and management of the PC beyond that of the cooler.
9. Peripherals
To complete the set of components, get some additional peripherals for the computer. These include the monitor, keyboard, mouse, and headset. To make full use of your GPU capabilities, ensure your monitor supports the highest resolution and refresh rate if your GPU. Headsets are also important when gaming. This is important when there are people around and you do not want to disturb them with the game sounds. Below are some of the components that you can get when building a gaming PC:
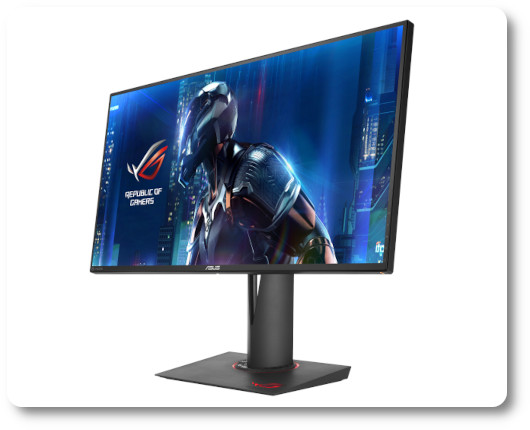
ASUS ROG Swift PG279QZ Monitor. A 27-inch, WQHD 2560 x 1440 resolution display. It features IPS technology for wide 178-degree viewing angles and realistic gaming visuals. Additionally, it has a 165Hz refresh rate.
Optionally, you can use a TV as your gaming monitor. See our list of the best TVs under $500.
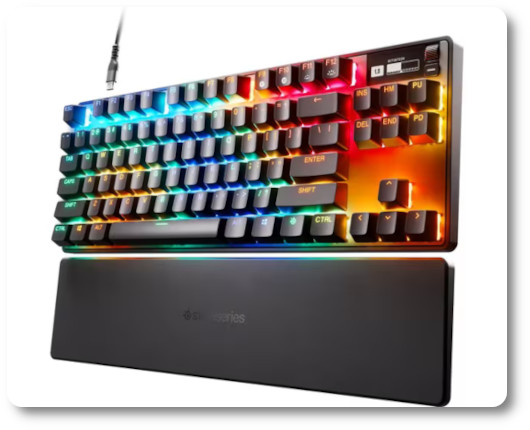
SteelSeries Apex Pro Keyboard. A high quality mechanical gaming keyboard with customizable actuation so you can set it to your preferred level of sensitivity. The keyboard features customizable per-key RGB lighting, allowing you to create your own unique color effects.
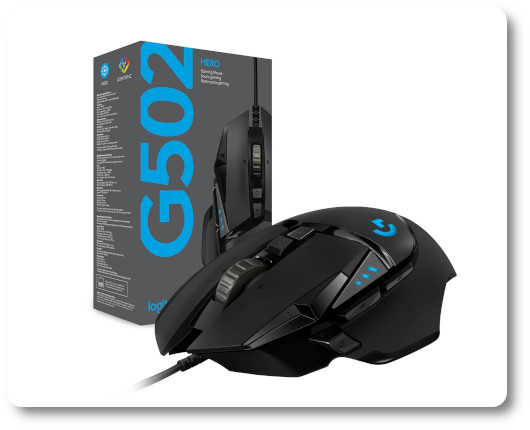
Logitech G502 HERO Mouse: This is a highly customizable gaming mouse that features an advanced optical sensor for maximum tracking accuracy. Additionally, it has customizable RGB lighting and custom game profiles. Moreover, it offers a DPI range of 200 up to 25,600. Furthermore, the G502 mouse delivers advanced gaming performance through its engineering.
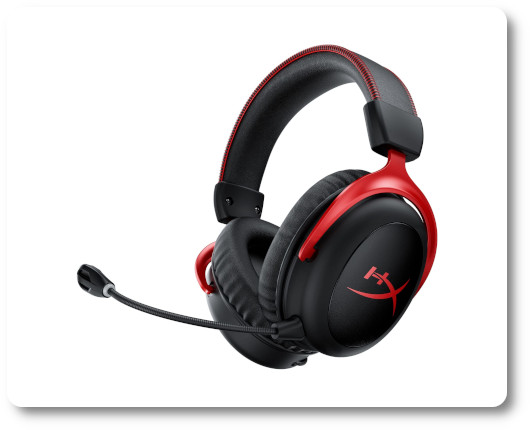
HyperX Cloud II Wireless Headset. This comfortable wireless headset is optimized for pro-gaming. To emphasize, it delivers superior sound quality, comfort, and style.
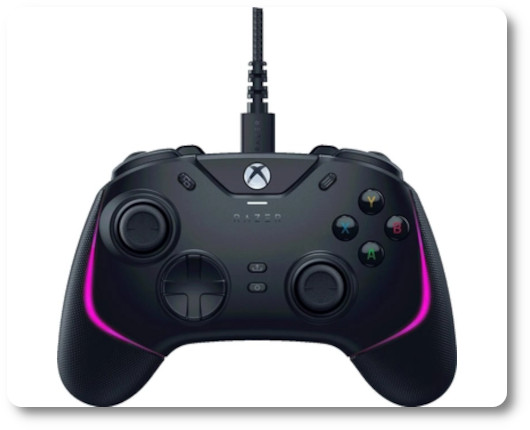
Razer Wolverine V2 Chroma Gaming Controller: A gaming controller is one piece of hardware that will significantly enhance your gaming experience. There are numerous gaming controllers compatible with computers, including the PS5 and Xbox controllers. Specifically, the Wolverine V2 Chroma, a premium wired controller, features customizable RGB strips along its grips. Additionally, it has six programmable micro buttons and swapable analog thumb caps. Alternatively, you can choose the Sony Dual-sense controller for the PS5 gaming console. Check our comparison for the The Razer Wolverine V3 against the Standard XBox Controller here.
Sony Dual-Sense controller – see it on amazon.com
Step 3: Assembling Your PC
1. Prepare Your Workspace.
Before starting the assembly, prepare your workspace. First, make sure the place is clean, free of dust, static-free, and well-lit. Next, have all your tools and components ready
2. Install the CPU.
Before you start touching the components, you need to strap yourself with an anti static wrist strap. Anti static wrist straps are designed to prevent build-up of static electricity and safely ground operators who are working with Electrostatic Discharge (ESD) sensitive components. You can now carefully place the CPU into the motherboard socket. This is done by aligning the notches, and securing it with the retention bracket.
3. Install the Random Access Memory (RAM).
Insert the RAM sticks into the DIMM slots, ensuring they click into place. The RAM sticks are usually designed to fit one way. Consequently, it is not likely that you will place them incorrectly.
4. Mount the Motherboard.
After you have put the CPU into the socket, and the RAM into the DIMM slots, its time to secure the motherboard to the case using standoffs and screws. Consult the manuals that came with the motherboard on how to install it to the case. Generally, you will need to align the motherboard according to the case openings at the back where you have the different input/ output ports. Ensure the motherboard is secured properly with the right screws.
5. Install the GPU.
Slot the GPU into the PCIe slot and secure it with screws. If the GPU needs a dedicated power input, you will need to insert the designated power cable from to the PSU to the GPU. However, this will be done after you install the PSU. Read the manual for instructions on how to install the GPU.
6. Install Storage.
Mount your SSD and HDD in their respective slots and connect them to the motherboard. SSD’s will usually be easier to install than HDD drives as you do not need to use screws to secure them to the case. HDD drives will need a data cable (SATA), as well as a power cable from the PSU to be connected. For SSD, you simply need to identify the designated SSD slot on the motherboard and slide it into place.
7. Connect the Power Supply Unit (PSU).
Install the PSU to the case using the designated screws. Ensure the PSU is firmly attached and that there is no obstruction to the fans. Attach all necessary power cables from the PSU to the motherboard, GPU, storage devices, and any additional components that need power. Again, consult the necessary documentation for installing the PSU.
8. Manage Cables:
Tidy up the cables using zip ties or Velcro straps to improve airflow and aesthetics. Some cases will have built in features for cable management. Having a neat box is very important especially for a gaming computer as it helps with proper air flow and therefore cooling.
9. Install the Cooling System:
Attach any additional coolers or fans, ensuring they are properly connected and oriented for optimal airflow.
Click on this link to see a video on assembling a gaming PC.
Step 4: Setting Up The Software On Your Gaming PC
1. Install Your Operating System:
The first piece of software to install in your system is the Operating System (OS). Use a USB drive to install your preferred operating system. For gaming, typically you will install Windows 10 or Windows 11. Linux OS is not well known to be a gaming operating system. This is mainly due to compatibility issues in both the games and controllers as well. But still, Linux is catching up and many people are adopting it as a gaming OS. Thanks to compatibility layer software making windows games run smoothly on Linux. Also, there is now more plug and play support for many controllers. Installing GPU drivers on Linux used to be an issue, but current distributions have native support for most NVIDIA GPUs. With that said, your best choice is a Windows operating system.
2. Update Drivers.
Once your OS has been installed, it is time to ensure all your hardware components have the latest drivers installed. It is necessary to check for the latest driver updates for your hardware components. Updated software include performance improvements and extra new features.
3. Install Games and Software.
With your Operating System installed and your hardware drivers up to date, it is finally time to install your favourite games. You will also need to install any necessary software like game launchers and utilities.
Step 5: Testing and Tweaking Your Gaming PC
1. Benchmark Your System.
Bench-marking helps you compare the performance of your computer to the others. There are many free tools to test the performance of your new build and ensure everything is running correctly. Some of these free tools include CineBench, Heaven, 3Dmark, and FRAPS.
2. Monitor Temperatures.
Always keep a close eye on CPU and GPU temperatures, especially during intensive gaming sessions, to prevent overheating. Again, there are free and paid tools that you can use to show you the temperature of your CPU, GPU, and other components in your system. One example is the Open Hardware Monitor software. This software does more than just check your temperature, it can also show you the fan speeds, memory usage, Network throughput, and many more. GPU-Z is another software specifically for your GPU monitoring.
3. Fine-Tune Settings.
your system will not be on its peak performance just out of the box. You will need to adjust in-game settings and hardware configurations to find the perfect balance between performance and visual quality.
Click this link to watch a video on software for monitoring and tweaking your PC.
To see one of the gaming laptops on our other post click on this Razer Blade 17 Pro.
Click here to see the ASUS ROG NUC 970 Gaming Mini PC review.
Conclusion
Building a gaming computer might look like a daunting task for many people. But if you plan properly and do research on the components that you need, it is an achievable and fun project to embark on. You need to make sure you understand the specifications of the different components that you plan to get. Compatibility is very crucial. Look around for the best deals on the components. You will be able to find fair prices if you look around on different sites. In the end, you will get a gaming computer that is tailored according to your needs. And you will gain more knowledge about the operations of your computer in the process. It is more rewarding than simply buying an already built gaming computer over the counter. Happy gaming!


Add a Comment